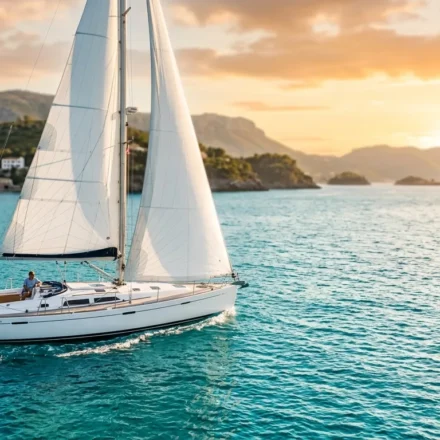



There’s a special kind of freedom that comes with dropping anchor, isn’t there? That moment when the engine is off, the sails are furled, and your sailboat settles into its chosen spot, swinging gently with the breeze and tide. It’s pure bliss. But let me tell you, that feeling of serenity is only truly earned when you know, deep in your gut, that your anchor is set, and your boat is going nowhere.
Table Of Content
- Understanding Your Gear: The Foundation of a Good Hold
- Anchor Types: Which Fluke for Your Bottom?
- Rode, Chain, and Swivels: The Critical Connections
- Windlass and Deck Gear: Making Life Easier
- The Art of Choosing Your Anchorage: More Than Just Pretty Scenery
- Reading the Charts and the Weather: Your Best Friends
- Assessing the Bottom: What Lies Beneath?
- Giving Room: Swinging Circles and Neighborly Distances
- Executing the Drop: Step-by-Step to a Secure Set
- Pre-Anchoring Checks: Don’t Skip These!
- The Approach: Setting Up for Success
- The Drop and Scope: The Golden Rules
- Setting the Anchor: The Critical Test
- Post-Set Vigilance: Don’t Just Walk Away
- Common Anchoring Mistakes to Avoid
- Under-Scoping: The Sinner’s Cardinal Sin
- Ignoring the Wind and Current Shifts
- Not Properly Setting the Anchor
- Relying Solely on Technology
- What to Watch Out For When You’re at Anchor
- Dragging Anchor: Signs and Solutions
- Fouling Your Anchor: Prevention and Recovery
- Weather Changes: Always Have an Exit Strategy
- Frequently Asked Questions
- What is the ideal scope for anchoring a sailboat?
- How do I know if my anchor is set properly?
- Should I use all chain or chain and rope rode?
For decades, I’ve seen it all out on the water – from textbook perfect sets to harrowing drag situations that could have been easily avoided. Anchoring isn’t just about dropping a heavy piece of metal overboard; it’s an art, a science, and a skill that every sailboat owner needs to master. It’s what separates a peaceful night’s sleep from a frantic, mid-watch scramble. So, let’s dive deep into how you can become an anchoring pro and ensure your vessel, and your crew, are always safe and sound.
Understanding Your Gear: The Foundation of a Good Hold
Before we even think about dropping anything, we need to talk about your equipment. Your anchor gear is your first line of defense against being blown ashore, so understanding it, and choosing the right setup, is paramount. Honestly, this is where many folks make their first mistake, either with mismatched gear or simply not having enough of it.
I’ve always believed that the best anchor is the one that’s designed for the conditions you expect to encounter most often. There’s no single “best” anchor for every scenario, which is why many seasoned cruisers carry at least two, often three, different types. Each design has its strengths and weaknesses, excelling in certain bottom compositions or under specific load conditions. Knowing your primary cruising grounds’ typical seabed is a huge advantage here.
Anchor Types: Which Fluke for Your Bottom?
Let’s break down the most common anchor types you’ll find on sailboats. This isn’t just theory; it’s practical knowledge that will directly impact your holding power.
| Anchor Type | Best for Bottom | Pros | Cons |
|---|---|---|---|
| Fluke/Danforth | Sand, Mud | Excellent holding in soft bottom; lightweight; stows flat. | Poor in rock, grass, coral; can trip easily if veered strongly. |
| Claw/Bruce | Sand, Mud, Rock, Coral | Good all-rounder; self-orienting; holds well in varied conditions. | Lower holding power for its weight compared to new designs; can drag in very soft mud. |
| Plow/CQR | Sand, Mud, Grass | Plows into bottom; articulates to re-set; decent all-rounder. | Can skate across hard bottoms; not the best for very soft mud. |
| Scoop/Rocna/Manson | Sand, Mud, Clay, Grass | Superior holding power; sets quickly and reliably; often considered primary anchor. | Bulky to stow; generally more expensive. |
My personal preference, especially for cruising sailboats today, leans heavily towards the modern scoop anchors like Rocna or Manson Supreme as a primary. Their holding power and reliability are simply unparalleled in most bottom conditions. But always carry a secondary, perhaps a Fluke or a robust Claw, for different situations or as a kedge anchor.
Rode, Chain, and Swivels: The Critical Connections
Your anchor is only as good as what it’s attached to. The anchor rode is the combination of chain and rope that connects your anchor to your boat. For sailboats, especially those cruising, an all-chain rode is the gold standard. Chain provides weight, which creates a flatter pull angle on the anchor, digging it in more effectively. It also offers excellent chafe resistance against the seabed.
A good rule of thumb is to have at least 150-200 feet of chain for a typical cruising sailboat, and often more for larger vessels or those heading into deeper waters. If you’re using a chain and rope combination, ensure you have plenty of chain at the anchor end (at least 30-50 feet, ideally more) to absorb shock loads and keep the anchor digging. Don’t forget the swivel – it’s a small but mighty piece of hardware that prevents your chain from twisting as your boat swings, ensuring the anchor is always ready to dig in.
Windlass and Deck Gear: Making Life Easier
Hauling up hundreds of feet of chain and a heavy anchor can be back-breaking work, especially if you’re anchoring multiple times a day or in deep water. This is where a windlass becomes invaluable. Electric windlasses are common on most modern cruising sailboats, taking the strain off your back. Make sure yours is properly maintained, with a clear drop for the chain into the locker and a reliable power supply.
Beyond the windlass, consider your bow roller: is it robust enough for your anchor? Is your chain stopper strong? Are your cleats securely mounted and appropriately sized for the loads your anchor rode will impose? These seemingly small details can become critical failure points if overlooked. A snubber or bridle system, which connects your chain to deck cleats via a length of strong rope, is also essential. It takes the load off the windlass, reduces chafe on the bow roller, and absorbs shock loads, leading to a much more comfortable ride at anchor.
The Art of Choosing Your Anchorage: More Than Just Pretty Scenery
Now that your gear is squared away, let’s talk about where to put it. This is where experience truly shines. You can have the best anchor in the world, but if you drop it in the wrong spot, you’re just inviting trouble. Choosing a good anchorage is a combination of foresight, local knowledge, and a healthy respect for Mother Nature.
It’s not just about finding a picturesque cove; it’s about finding a *safe* cove. Think about what’s going on above and below the surface, and how your sailboat will interact with it over the duration of your stay. Trust me, I’ve seen too many skippers make decisions based solely on the view, only to regret it when the wind pipes up or the tide turns.
Reading the Charts and the Weather: Your Best Friends
Your charts, whether paper or electronic, are your most important tool for choosing an anchorage. Look for depths, seabed composition (often indicated by symbols like ‘S’ for sand, ‘M’ for mud, ‘R’ for rock, ‘Gr’ for gravel, ‘Wd’ for weed), and any underwater cables or obstructions. Identify potential hazards: reefs, isolated rocks, strong currents, or areas prone to swell. Pay attention to contour lines – a gently sloping bottom is often better for setting an anchor than a steep drop-off.
Equally critical is the weather forecast. What are the prevailing winds? Are there any shifts expected? How will the wind affect the fetch (the distance the wind travels over open water)? A calm anchorage with a northerly breeze might become a bouncy washing machine if the wind shifts to the south and blows unimpeded across a large bay. Always have a plan B, or even a plan C, for different wind directions. This proactive thinking is what really separates the pros from the novices.
Assessing the Bottom: What Lies Beneath?
We touched on this with anchor types, but it bears repeating: knowing the seabed composition is vital. Sand and mud generally offer the best holding, allowing the anchor to bury deep. Hard clay can be good but can also be tricky for some anchor types to penetrate. Rocks are a double-edged sword: great for holding if your anchor bites, but a nightmare if it gets fouled. Coral is a definite no-go – it’s illegal to anchor on live coral in many places, and it’s destructive to a vital ecosystem. Plus, it’s terrible for your anchor.
How do you confirm the bottom type? Charts are a start. Your depth sounder might give you clues about the hardness. Sometimes, a quick visual inspection in clear water from your dinghy can reveal a lot. Failing that, a ‘test drop’ where you motor slowly and feel for the anchor digging in can tell you if you’re on something good. A truly experienced hand can even tell a lot by the “feel” of the anchor setting through the chain on deck. It’s a subtle vibration and sound that tells you your anchor is digging in.
Giving Room: Swinging Circles and Neighborly Distances
This is where the mini-scenario comes in. Imagine this situation: you pull into a crowded anchorage. You find a spot, drop your anchor, and feel secure. But what would you do if the wind shifts 180 degrees overnight? Your boat, and everyone else’s, will swing in an arc determined by their length and the length of their rode. If you haven’t accounted for this, you could find yourself tangled with a neighbor, or worse, aground.
Always consider your swing circle. It’s the radius from your anchor to the furthest point your boat can reach. You need to ensure this circle is clear of other boats, navigation hazards, and shallow water in *all* expected wind and tide conditions. Look at how other boats in the anchorage are set. Are they all on chain? Are they similar sizes? Different rode lengths or boat types will result in different swing characteristics. When in doubt, err on the side of giving more room. It’s better to be a bit further out than risk a collision.
Executing the Drop: Step-by-Step to a Secure Set
Okay, gear is ready, spot is chosen. Now for the main event: deploying your anchor. This isn’t a race; it’s a deliberate, controlled process. Follow these steps for reliable sailboat anchoring.
Pre-Anchoring Checks: Don’t Skip These!
Before you even approach your desired spot, run through a quick checklist. This saves headaches later:
- Check the weather forecast one last time: Any surprises?
- Confirm your chosen spot on the chart: Depths, bottom type, swing room.
- Prepare your engine: Ensure it starts and is ready for use, just in case you need to maneuver quickly.
- Inspect your anchor rode: Is it free of twists, clear to run, and properly attached to the anchor and boat?
- Ready your dinghy: If you plan to explore, make sure it’s accessible.
- Communicate with your crew: Assign roles – one at the helm, one at the bow for the drop.
The Approach: Setting Up for Success
Approach your chosen spot slowly, motoring *against* the wind or current, whichever is stronger. This gives you maximum control. Aim for a point slightly *past* where you want your anchor to finally settle, allowing for some drift back as you deploy the rode. As you get closer, assess the surroundings again. Are there any last-minute surprises? Does the wind feel as forecast? Is the water depth consistent with the chart?
Once you reach your ‘drop point,’ stop the boat. Let the wind or current push you gently backward. This is the moment to start paying out your chain. The idea is to have your boat drifting directly over the chain as it’s deployed, laying it out in a straight line on the seabed, rather than piling it up. This significantly reduces the chances of tangling or fouling.
The Drop and Scope: The Golden Rules
As your boat drifts astern, begin to lower the anchor. Don’t just “throw” it; control its descent. For a good hold, a proper anchoring scope is crucial. Scope is the ratio of the length of your anchor rode (chain plus rope) to the depth of the water (plus the height of your bow roller above the waterline). A common minimum scope is 5:1 for fair weather, increasing to 7:1 or even 10:1 in rougher conditions or when anchoring overnight.
So, if you’re in 15 feet of water, and your bow roller is 5 feet above the water, your effective depth is 20 feet. For a 5:1 scope, you’d want to deploy 100 feet of rode. For a 7:1 scope, 140 feet. Pay out the chain smoothly, keeping track of how much has been deployed. Most anchor chains have markers (paint, zip ties) at intervals, which is incredibly helpful. Once you’ve paid out the desired scope, gently snub the chain to begin setting the anchor.
Setting the Anchor: The Critical Test
This is arguably the most important step. With the desired scope paid out, slowly apply reverse engine power. Start with minimal throttle, gradually increasing it. You should feel the anchor dig in and the boat resist the pull. Watch your shore bearings or your GPS anchor alarm – if your boat isn’t moving, or is moving very slowly backward while the chain tightens, it’s a good sign your anchor is setting. A properly set anchor will often give a distinct thrumming feel through the chain and a vibration through the hull as it buries itself.
Once you’re confident it’s set, increase power to about 1/3 to 1/2 throttle in reverse for 30 seconds to a minute. This puts a significant load on the anchor, simulating strong wind gusts, and ensures it’s deeply buried. If it holds firm under this stress test, you can be reasonably confident in your hold. If it drags, pick it up and try again.
Post-Set Vigilance: Don’t Just Walk Away
After a successful set, don’t immediately crack open a cold beverage. Take the time to confirm your position. Use your GPS to mark your anchor position and set an anchor alarm. Many chart plotters and smartphone apps have this feature, alerting you if your boat moves outside a predefined radius. Take visual bearings to fixed objects ashore. Re-evaluate your swing room relative to other boats or hazards. Check the weather again. This vigilance is a mark of a true pro.
Common Anchoring Mistakes to Avoid
Even with good intentions, it’s easy to fall into bad habits. Based on my experience, these are the most frequent anchoring mistakes I’ve observed:
Under-Scoping: The Sinner’s Cardinal Sin
This is probably the number one mistake. Folks don’t pay out enough chain, especially in crowded anchorages where they want to minimize their swing. The problem? A short rode means a steeper pull angle on the anchor, reducing its ability to dig in and hold. It’s like trying to pull a nail out straight rather than at an angle. The anchor will pull out easily. Always use adequate scope, even if it means finding a less crowded spot or adjusting your position.
Ignoring the Wind and Current Shifts
Many boaters will choose an anchorage based on the current wind direction, but fail to consider how a shift could expose them to swell, shallower water, or other boats. Always plan for the worst-case scenario. Consult your charts and weather forecasts for the full tidal and wind cycles. A spot that’s perfectly calm now might be untenable in six hours.
Not Properly Setting the Anchor
Dropping the anchor and simply letting the boat drift until it “stops” is not setting it. You must apply reverse power to ensure the anchor digs in and buries itself deeply. Without this crucial step, the anchor is merely resting on the bottom, waiting for the first strong gust or tide change to pull it free.
Relying Solely on Technology
GPS and anchor alarms are fantastic tools, but they are *aids*, not replacements for seamanship. What happens if your electronics fail? Always take visual bearings to shore. Understand the natural forces at play – wind and current. Your eyes and ears are still your best navigational instruments when it comes to keeping a watch at anchor.
What to Watch Out For When You’re at Anchor
Even after a perfect set, the job isn’t entirely done. Staying vigilant while at anchor is key to a peaceful stay. Things can change, and you need to be prepared to react.
Dragging Anchor: Signs and Solutions
How do you know if your anchor is dragging? The most obvious sign is your boat moving from its original position (your anchor alarm should catch this!). Also, watch your visual bearings to shore; if they start to change in a systematic way that indicates movement, you’re dragging. Another clue is a sudden jolt or shudder, or the chain becoming slack then taut again, suggesting the anchor is catching and then slipping. If you suspect dragging, immediately start your engine, retrieve the anchor, and re-anchor in a better spot or use a different technique. Don’t wait until you’re too close to a hazard!
Fouling Your Anchor: Prevention and Recovery
A fouled anchor is one that’s snagged on an underwater obstruction like a rock, cable, or old mooring. You can often prevent this by carefully studying your charts for seabed type and obstructions. If you do foul, the first step is to motor slowly around the obstruction, trying to get the chain to lift off. Sometimes changing the angle of pull helps. If that fails, a trip line attached to the anchor’s crown (if your anchor has one) can be invaluable for pulling it free backward. In extreme cases, you might need to dive on it, but always assess the conditions and your capabilities first.
Weather Changes: Always Have an Exit Strategy
Weather systems can be notoriously fickle. A gentle breeze can turn into a gale, or a calm sea can become a confused chop with an unexpected swell. Always, always have an exit strategy. Know where your nearest safe harbor is, where you can re-anchor, or where you can safely deploy a second anchor if conditions deteriorate. Don’t be afraid to pull up and move if you become uncomfortable. Your safety and the safety of your boat are always the top priority. It’s better to be overly cautious than to regret it later, wouldn’t you agree?
Frequently Asked Questions
What is the ideal scope for anchoring a sailboat?
For fair weather, aim for a minimum of 5:1 scope (rode length to depth). In rougher conditions or overnight, increase this to 7:1 or even 10:1 for maximum security.
How do I know if my anchor is set properly?
After deploying your rode, apply strong reverse engine power for 30-60 seconds. If the boat resists moving and your GPS position remains stable, your anchor is likely well-set.
Should I use all chain or chain and rope rode?
For cruising sailboats, all chain is generally preferred for its superior holding power, shock absorption, and chafe resistance. A minimum of 30-50 feet of chain at the anchor end is recommended if using a rope/chain combination.
Mastering sailboat anchoring techniques isn’t just about technical skill; it’s about developing a deep understanding of your boat, your gear, and the marine environment. It’s about confidence, peace of mind, and ultimately, the freedom to explore those beautiful, remote anchorages that make cruising so rewarding. So, take this guide, practice these steps, and go drop that hook like the seasoned pro you’re becoming. See you out on the water, securely at anchor!