


Ahoy, Fellow Mariners! The Unsung Heroes of Our Vessels
As someone who’s spent decades navigating the intricate world of boats and yachts, from the serene waters of a coastal cruise to the exhilarating challenges of an offshore passage, I’ve witnessed firsthand the critical role that a seemingly simple piece of line can play. My journey, whether it’s been helping a family find their perfect Beneteau Oceanis cruising sailboat or guiding a first-time angler in securing their Boston Whaler, has consistently reinforced one undeniable truth: a good boat, no matter its size or pedigree, is only as safe and secure as the knots that hold it.
Table Of Content
- Ahoy, Fellow Mariners! The Unsung Heroes of Our Vessels
- Why Knot Savvy is Non-Negotiable for Every Boater
- The Hidden Costs of Complacency
- Understanding the Language of Lines: Basic Terminology and Principles
- Your Essential Boating Knots: Hands-On Mastery for Every Mariner
- The Bowline: The Mariner’s Lifeline and King of Knots
- The Cleat Hitch: Securing Your Sanctuary at the Dock
- The Clove Hitch: Quick Fix, Smart Caution
- The Figure Eight Knot: The Indispensable Stopper
- The Sheet Bend: Forging Connections Between Lines
- The Round Turn and Two Half Hitches: The Secure Adjustable Mooring
- Practice, Preservation, and The Lifelong Journey of Knot Craft
Mastering basic boating knots isn’t just a quaint maritime tradition or a fancy parlor trick; it’s a foundational pillar of safety, confidence, and pure, unadulterated boating enjoyment. Think about it: every time you tie off your vessel to a dock, secure a tender, hoist a sail on a Catalina 30, or simply lash down gear, you’re entrusting the safety of your investment, your crew, and your peace of mind to a carefully formed loop and tuck. It’s the difference between a restful night at anchor, lulled by gentle waves, and a frantic dash to prevent drifting or an unexpected collision.
This isn’t merely about mechanics; it’s about connecting with centuries of maritime heritage, where a mariner’s skill with a line often meant the difference between life and loss. So, grab a length of rope – a simple piece of cord, even a shoelace, will do – and let’s dive deep into the practical magic of essential boating knots. Your journey to enhanced onboard safety and unwavering confidence starts here.
Why Knot Savvy is Non-Negotiable for Every Boater
From the nimble day sailer, often under 25 feet, to the robust bluewater cruising yacht, sometimes stretching beyond 60 feet, every vessel relies profoundly on properly tied lines. Imagine the immense pride you feel as you approach the dock with your beautiful new Jeanneau Sun Odyssey or your meticulously maintained Grand Banks trawler. A strong, reliable knot ensures she stays precisely where you left her, regardless of an unexpected gust of wind, a shifting tide, or the wake of a passing vessel. A poorly tied knot, however, can unravel a day of joy into a cascade of costly headaches.
Consider the statistics: a significant percentage of boating incidents, particularly those involving damage during mooring or anchoring, can be traced back to inadequate or improperly tied knots. The U.S. Coast Guard Auxiliary reports numerous cases annually where boats break free from their moorings, leading to scuffs, collision damage with other vessels, or even becoming completely lost. This isn’t just about securing your boat; it’s about diligently protecting your substantial investment, ensuring the safety of your crew and guests, and safeguarding the very dreams that brought you to the water in the first place.
The Hidden Costs of Complacency
Beyond the immediate safety concerns, the financial implications of knot negligence can be substantial. A boat that breaks free can incur thousands of dollars in hull repairs, gelcoat restoration, or even propeller damage if it drifts into shallow water. Dock lines themselves, if improperly secured, can chafe and fail prematurely, costing you money in replacements. More critically, the loss of a vessel due to a failed knot can be an insurable event, but it’s one that no boater ever wants to experience, often leading to increased premiums or even non-renewal. Your time, a precious commodity, is also at stake; hours spent dealing with preventable damage are hours not spent enjoying the open water.
Moreover, think about the operational efficiency. A well-chosen and correctly tied knot ensures that sails can be quickly and securely hoisted and trimmed, fenders can be deployed and retrieved without hassle, and essential gear remains lashed down even in choppy conditions. This translates directly to a smoother, more enjoyable, and ultimately safer boating experience. When you’re confident in your knots, you’re confident in your control over the vessel, and that confidence radiates through every aspect of your time afloat.
Understanding the Language of Lines: Basic Terminology and Principles
Before we embark on the hands-on journey of tying, it’s crucial to understand the fundamental terminology that underpins knot craft. Just as a sailor learns the parts of a boat, a knot expert understands the anatomy of the rope itself when being manipulated. This common language ensures clarity and precision, making the learning process far more effective.
- Standing Part: This is the long, unused, or inactive portion of the rope, extending away from the knot. It’s the part that typically bears the load.
- Working End (or Bitter End): This is the end of the rope you are actively using to tie the knot, the part that moves and forms the various loops and turns.
- Bight: A simple curve or U-shape in the rope, where the rope does not cross itself.
- Loop (or Eye): A full circle formed by the rope, where the rope crosses over itself.
- Turn: A wrap of the rope around an object, such as a cleat or post.
Beyond terminology, there are core principles that elevate knot tying from a mere mechanical action to an art form. These principles ensure your knots are not just tied, but tied correctly, ready to perform their vital functions with reliability.
- Dressing a Knot: This refers to arranging the turns and parts of a knot so that they lie neatly, parallel, and in proper alignment. A well-dressed knot is stronger, less prone to slipping, easier to inspect, and visually appealing. It’s often the difference between a functional knot and a weak one.
- Setting a Knot: Once dressed, a knot must be “set” or tightened properly. This means pulling all parts of the knot snugly, removing any slack, but not over-tightening to the point of causing damage to the line or making it impossible to untie later. The goal is firm, uniform tension.
- Choosing the Right Line: The knot is only as good as the rope it’s tied in. Consider the line’s material (nylon for stretch, polyester for low stretch, polypropylene for floatation), diameter (thicker for strength, thinner for flexibility), and intended use. Using a thin, weak line for a heavy load, regardless of your knot prowess, is a recipe for failure.
- Understanding Load: Different knots perform differently under various types of load – constant tension, intermittent jerking, or multi-directional stress. Knowing a knot’s strengths and weaknesses for specific applications is crucial.
Your Essential Boating Knots: Hands-On Mastery for Every Mariner
Now, let’s get practical. Here are the foundational knots I recommend every boater, regardless of their vessel or experience level, should not only know but be able to tie confidently, even in the dark or under pressure. Grab that piece of rope and follow along – practice truly makes perfect.
The Bowline: The Mariner’s Lifeline and King of Knots
If there’s one knot you absolutely must commit to muscle memory, it’s the Bowline. Often hailed as the “King of Knots,” it forms a secure, non-slip loop at the end of a line that will not tighten under strain. It’s incredibly reliable and relatively easy to untie, even after bearing a significant load, which makes it indispensable for countless onboard applications.
- Usage: Attaching dock lines to pilings or rings, creating a temporary rescue loop for an overboard person, securing a halyard (a line used to hoist a sail, like a mainsail or genoa) to a shackle, or creating an emergency tow point.
- How to Tie (the classic “rabbit out of the hole” method):
- Make a small loop (the “hole”) in the standing part of the rope, ensuring the working end is on the side furthest from you.
- Pass the working end up through the hole (the “rabbit comes out”).
- Wrap the working end around the standing part, going behind it.
- Pass the working end back down through the original hole (the “rabbit goes back in”).
- Pull the standing part and the loop (the “tree”) to tighten, ensuring the working end is securely trapped within the knot. Dress the knot carefully so all parts lie neatly.
The Cleat Hitch: Securing Your Sanctuary at the Dock
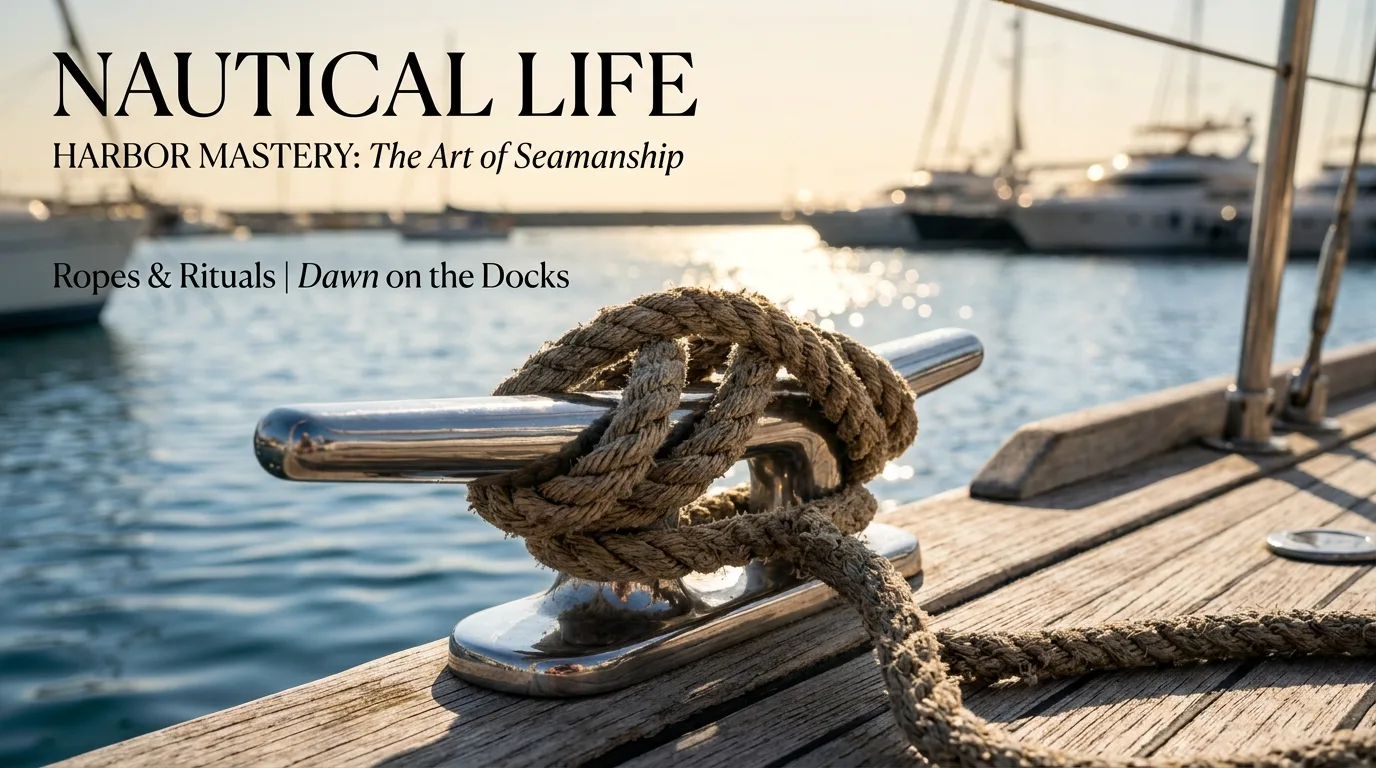
This knot is absolutely vital for securing your boat to a cleat – that horned fitting found ubiquitously on docks, jetties, and boat decks, common on everything from small fiberglass runabouts to expansive aluminum powerboats and sailing yachts alike. A properly tied cleat hitch distributes the load evenly and provides a strong, reliable hold.
- Usage: Mooring, docking, securing fenders (bumpers that protect your hull from impact) to the boat’s rail, or temporary attachment points.
- How to Tie:
- Take one full turn around the base of the cleat horn furthest from the direction of pull. This initial turn takes the primary strain.
- Cross over the top of the cleat, making a figure-eight pattern around the two horns.
- For the final turn, make a “locking half hitch” by passing the working end under itself as it crosses the cleat, ensuring it jams tight. This creates friction and prevents slippage.
- Pull snug, ensuring the figure-eight pattern is neat and tight. Avoid excessive wraps; typically three figure-eights plus the locking turn are sufficient.
The Clove Hitch: Quick Fix, Smart Caution
The Clove Hitch is celebrated for its speed in tying and untying, making it incredibly handy for temporary applications. However, it comes with a crucial caveat: it can slip under sustained or varying loads, especially on smooth surfaces, and is not considered suitable for critical applications where security is paramount. Use it wisely, and often back it up with a half hitch or two for added security.
- Usage: Attaching fenders to stanchions (vertical posts supporting lifelines), temporarily securing items like a bucket or tools, or holding a line while you adjust something else, such as securing a sail cover.
- How to Tie (Two methods):
Method 1 (Around an object):
- Pass the working end around the object (e.g., a rail or stanchion).
- Cross the working end over the standing part.
- Pass the working end around the object again, feeding it under the second turn.
- Tighten both ends, ensuring the turns are snug.
Method 2 (Over an end, for posts):
- Form a loop with the working end going over the standing part.
- Form a second identical loop next to the first.
- Place the second loop on top of the first.
- Drop both loops over the top of the post and pull the standing part to tighten.
The Figure Eight Knot: The Indispensable Stopper
This simple yet incredibly effective knot is a boater’s best friend for preventing lines from slipping through blocks (pulleys), fairleads (fittings that guide a line), or even out of your hand. It’s bulkier than an Overhand Knot, making it easier to untie after being under load, which is a significant advantage.
- Usage: Creating a reliable stopper knot at the end of sheets (lines that control sail trim, like your genoa sheets), halyards, control lines, or any line that needs to be prevented from running out.
- How to Tie:
- Make a loop with the working end passing over the standing part.
- Pass the working end over the standing part again, then under the standing part, and finally up through the original loop.
- Pull tight to form the distinctive “8” shape, ensuring it is well-dressed and snug.
The Sheet Bend: Forging Connections Between Lines
Need to extend a line or join two ropes, perhaps even of different diameters? The Sheet Bend is your go-to knot, far more reliable and secure than a Square Knot for this purpose, especially when joining lines of unequal size or different materials. It’s an invaluable skill for jury rigging or adapting lines for new purposes.
- Usage: Joining two lines, particularly those of different sizes (e.g., a thin polyester sheet to a thicker nylon dock line), creating longer lines, or emergency repairs.
- How to Tie:
- Form a bight in the end of the thicker rope (this will be your “standing part” for the knot). Hold this bight open.
- Take the working end of the thinner rope and pass it up through the bight from underneath.
- Wrap the thinner working end around the back of the bight (around the standing part of the thicker rope).
- Bring the thinner working end back across the front of the bight and tuck it under its own standing part, where it emerged from the bight.
- Pull both standing parts and the working end of the thinner rope to tighten, ensuring the knot is well-dressed. For extra security, especially with very slippery or dissimilar lines, consider a Double Sheet Bend (adding an extra wrap).
The Round Turn and Two Half Hitches: The Secure Adjustable Mooring
For a highly secure, yet easily adjustable and releasable knot, the Round Turn and Two Half Hitches is a true workhorse. It’s excellent for attaching a line to a ring, post, or rail, particularly when a strong, temporary, but adjustable hold is required. The initial “round turn” distributes the load, reducing strain on the subsequent hitches.
- Usage: Securing a dinghy painter to a dock ring, attaching a fender line to a rail, creating a temporary mooring to a piling, or securing a bucket handle.
- How to Tie:
- Take the working end of your rope and make two full wraps (a “round turn”) around the object (e.g., a post, ring, or rail). Ensure these turns are snug against each other. This takes the initial strain.
- Now, bring the working end over the standing part of your line and then tuck it under itself, forming the first “half hitch.” Pull it snug.
- Repeat the previous step: bring the working end over the standing part again, and tuck it under itself, forming the second “half hitch.”
- Pull both half hitches tight against the round turns. Ensure they are well-dressed and that the knot is firm.
Practice, Preservation, and The Lifelong Journey of Knot Craft
Learning these knots is just the beginning; true mastery comes through consistent practice. I’ve seen countless boaters, from seasoned captains to fresh-faced novices, struggle under pressure because they hadn’t ingrained these skills into their muscle memory. Set aside ten minutes a day with a piece of rope. Practice tying these knots blindfolded, with one hand, or even in rough weather conditions (simulated, of course!). The goal is to make the process automatic, so you can execute them flawlessly when it truly matters.
Beyond tying, the longevity and reliability of your lines are paramount. Proper line care is integral to knot security. Regularly inspect your ropes for chafe, sun damage (UV degradation weakens fibers significantly), and excessive wear, especially near cleats, blocks, and fairleads. Clean your lines periodically with fresh water and a mild detergent to remove salt and grit, which can accelerate wear and stiffen the fibers. Store unused lines coiled neatly, out of direct sunlight, and away from harsh chemicals. A well-maintained line is not only safer but will also extend the life of your equipment and ensure your knots hold true.
Ultimately, a deep understanding and confident execution of boating knots contributes immensely to your overall safety and enjoyment on the water. It’s a tangible skill that empowers you to handle challenging situations, protects your valuable assets, and allows you to truly relax and savor the experience of being afloat. As you grow more proficient, you might explore more advanced knots, splices, or hitches, further deepening your connection to the rich tapestry of maritime tradition. Remember, the journey of a mariner is one of continuous learning, and your command of the line will always be a testament to your skill and dedication.